Stacked Grml
This is the latest (recommended and more advanced) way to remastering grml.
The following is converted into wiki format from ”Using grml to build a stacked Debian Live system”.
There are further discussions there of the possible confusions about the name grml-{full,medium} used in this wiki.
Advantages of Stacked Grml
If grml is build on top of grml-medium, which is build on top of grml-small, then putting all 3 flavor on the same USB would not cost you more than one CD space, whereas currently it almost needs two.
Another great advantage is that, I never need to remaster my live system any more just for my own customization – putting my extra stuff in is just as simple as putting in several modules. My live-usb always contains the latest tools/docs of my own, without going through the live system remastering process. I had about 7 layered modules that I build for slax and I just put them on top of grml. It works perfectly.
Further, with stacked live system, you can, for the first time, load grml-small into ram (or grml-medium depending on your ram size), and leave the rest on USB/CD.
Most importantly, it'll be much faster. Suppose your stacked live system is layered like the following:
- All console tools
- Xorg + lightweight window manager + essential X tools like gparted
- Heavy weight desktop system (Gnome/Kde)
- Occasionally used applications (KOffice/Latex)
If you limit your self to only certain tasks (say console-only hacks), then you only need a limited number of modules to be loaded; all other modules are not loaded on start up. hence it will start faster, use less ram, and cause applications to run faster. Moreover your CD drive will only seek in a small area (instead of all across the whole CD). You don't even need to load it to ram if the loaded modules can be fully cached by the kernel. This significantly improves the speed. On the other hand, you can enjoy the full fledged desktop applications if you want to, from the very same CD.
Furthermore, from the practical point of view,
- it might not be that easy to get everything straight out when you first try grml-live. So it is better to start small at first. My first layer is only about 100M big, so it is much faster to build than going for the whole 700M CD, considering you need to run it over and over to get it perfect. If you have successful gained a solid ground, you can then go one step further. Having such stacked framework enable you try each step individually, if you screw it, you don't need to start all over again.
- having such stacked framework makes it possible for my own system customizations to survive system upgrading. I just need to make customized changes to my own system once and only once (for example setting up an anonymous ftp uploading capability with write-only no-read-back access). Then no matter how many brand-new installations I do later on, I don't need to do such customizations again, because my customizations stay on the upper level than the installed system.
Steps to Create Stacked Grml
OK, enough “selling”. Let's see how it can be achieved using aufs + grml tools. I'll use the scenario that grml-full is build on top of grml-medium, which is build on top of grml-small as the example.
- Use aufs to create the stacked framework. The first command creates necessary directories, and the 2nd creates a stacked aufs file system, of which /grml/grml-layers/grml-work is the RW working branch. In this aufs file system, if a file is not available in grml-full, aufs looks in grml-medium, else in grml-small.
mkdir -p /grml/grml-live/grml_chroot/ /grml/grml-layers/{grml-full,grml-medium,grml-small,grml-work} mount -t aufs -o br=/grml/grml-layers/grml-work=rw:/grml/grml-layers/grml-full=ro+wh:/grml/grml-layers/grml-medium=ro+wh:/grml/grml-layers/grml-small none /grml/grml-live/grml_chroot/ - Use grml-live to build the first layer.
  CLASSES='GRMLBASE,GRML_SMALL,RELEASE,AMD64'
  ARCH=amd64
  grml-live -a $ARCH -c $CLASSES . . .
- Now the first layer, grml-small, is available under /grml/grml-live/grml_chroot/, which is the mount point of the aufs file system. We need to move the content from RW layer to the lower /grml/grml-layers/grml-small layer. Note that the final umount and mount is recommended after the move, because the inode number may be changed.
  mv /grml/grml-layers/grml-work/* /grml/grml-layers/grml-small
  # or
  rsync --exclude=lost+found -aHSx --devices --specials --remove-source-files --exclude=/.wh..wh.* /grml/grml-layers/grml-work/ /grml/grml-layers/grml-small/
  umount /grml/grml-live/grml_chroot/
  !mount
- Install the next layer. This time grml-debootstrap is used instead, to install all grml-medium packages on top of the current chroot system.
grml-debootstrap --verbose --nodebootstrap --target /grml/grml-live/grml_chroot/ --release sid --arch amd64 --packages=/path/to/pkg.lst . . .
- Now grml-medium is available under /grml/grml-live/grml_chroot/. Again, we need to move and reflect all modifications from upper to lower layer. This time is to grml-medium:
  rsync --exclude=lost+found -aHSx --devices --specials --remove-source-files --exclude=/.wh..wh.* /grml/grml-layers/grml-work/ /grml/grml-layers/grml-medium/
  umount /grml/grml-live/grml_chroot/
  !mount
- Repeat step 4 and 5 to finish grml-full.
- Create squashfs filesystem
  ln -s grml.squashfs /grml/grml-live/grml_cd/live/grml_small.squashfs
  mksquashfs-lzma /grml/grml-layers/grml-medium /grml/grml-live/grml_cd/live/grml_medium.squashfs -b 256k -lzma -e boot
  mksquashfs-lzma /grml/grml-layers/grml-full /grml/grml-live/grml_cd/live/grml_full.squashfs -b 256k -lzma -e boot
- Create stacked squashfs filesystem. I'm using grml-full as an example. Under /grml_cd/live/, create a file, say grml-full.module, in which contains:
  grml_small.squashfs
  grml_medium.squashfs
  grml_full.squashfs
- Make it bootable. I'm using grub as an example. In the kernel line, use the following. Note the grml-full is the file you just named without the .module extension.
kernel ... live-media-path=/live module=grml-full
- Rebuild CD. To rebuild CD, just remove/rename the generated iso file (otherwise, you will get “Skipping stage 'iso build'”), then us the same grml-live command line that you use to build the first layer CD, grml-live will skip all steps (which is exactly what we want) and generate a bootable CD with the newly added squashfs modules.:
Is this ok for you? [y/N] y

 * Logging actions to logfile /var/log/grml-live.log
 * Skiping stage 'fai dirinstall' as /dev/shm/gl/grml_chroot exists alr  [ ok ]
 * Skipping stage 'boot' as /dev/shm/gl/grml_cd/boot/isolinux exists al  [ ok ]
 * Skipping stage 'squashfs' as /dev/shm/gl/grml_cd/live exists already  [ ok ]
Size of boot image is 4 sectors -> No emulation
  1.29% done, estimate finish Tue Aug  3 15:37:29 2010
 . . .
 99.07% done, estimate finish Tue Aug  3 15:37:37 2010
Total translation table size: 2048
Total rockridge attributes bytes: 23394
Total directory bytes: 45056
Path table size(bytes): 118
Max brk space used 33000
388613 extents written (759 MB)
 * Creating hybrid ISO file with manifold method
geometry is 1554944 sectors (796131328 bytes) in 3037 cylinders, 16 heads, 32 sectors per track
0 @0x168: 60 @4 (0x4)
 - 0x168: 32 (0x20) @ 4 (0x4)
 - 0x16A: 28 (0x1C) @ 36 (0x24)
using 2 blocks, 4 bytes (82 free)
using sectors of 2^9 = 512 bytes                                         [ ok ]
 * Finished execution of stage 'iso build'                               [ ok ]
 * Successfully finished execution of grml-live [Tue Aug  3 15:37:46 EDT 2010 - running 21 seconds]                                                      [ ok ]
- Put it on USB or burn it to CD and test it. That's it.
Note
- The above is for illustration purpose only. Substitute with your own CLASS or path please.
- About the aufs stacked framework in step 1, this is a very useful feature. I also use it to work parallel with grml-live so as not to mess up with /etc/grml/fai/ directory with user files, thus making it easy when upgrading grml-live. Moreover, it allows me to maintain one set of my customizations, and switch my base FAI config space between default grml-live installation and most up-to-date grml-live git instantly.
- About installing the rest of the layers in step 4, apart from using grml-debootstrap, you can also use grml-chroot, Debian live-helper, or simply chroot. Moreover, ideally you can use grml-live as well
% grml-live -c $CLASSES -u -q -n
. . .
  Executing UPDATE instead of fresh installation.
  Skipping creation of SQUASHFS file.
  Skipping creation of ISO file.
- -u: Update existing chroot instead of rebuilding it from scratch.
- -q: Build the release without (re-)creating the squashfs compressed file using mksquashfs.
- -n: Skip creation of the ISO file.
- About moving all modifications from upper down to lower layers, the official way is to use aubrsync, but I personally think it is dangerous to do so because you may loose data if you do it again. Of cause this is only my personal view and the author of aufs strongly disagrees with me. YMMW. Since iterations of trial runs is inevitable to me, I opt for the plain rsync approach instead, which works just fine for me.
- About rebuilding CD in step 10, to be on safer side, you can also use -b or -B:
- -b: build the ISO without updating the chroot via FAI
- -B: build the ISO without touching the chroot (skips cleanup)
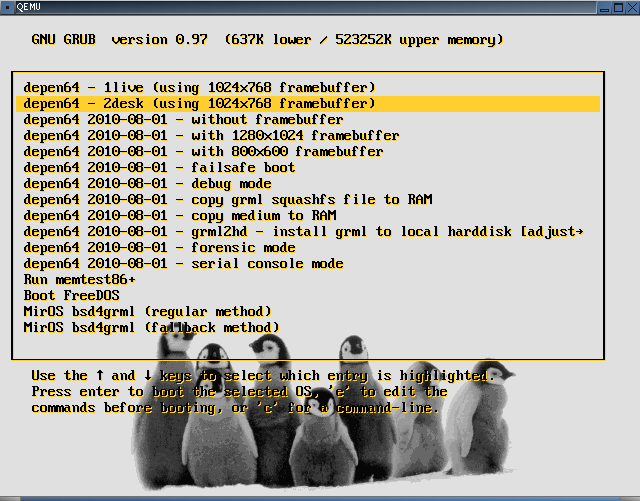
- More on multi-squashfs modules booting, Here is my settings (note that I use grub to boot CD, screenshot @ http://bts.grml.org/grml/file306/screenshot.png), FYI:
$ cat grml_cd/boot/grub/menu.lst
. . .
# define entries:
title depen64 - 1live (using 1024x768 framebuffer)
kernel /boot/depen64/linux26 apm=power-off vga=791 quiet boot=live nomce
initrd /boot/depen64/initrd.gz

title depen64 - 2desk (using 1024x768 framebuffer)
kernel /boot/depen64/linux26 apm=power-off vga=791 quiet boot=live module=2desk nomce
initrd /boot/depen64/initrd.gz
. . .

$ ls -l grml_cd/live/
total 761372
-rw-r--r-- 1 root root        46 2010-08-03 14:56 2desk.module
lrwxrwxrwx 1 root root        16 2010-08-03 14:55 depen64_1live.squashfs -> depen64.squashfs
-rwx------ 1 root root 440647680 2010-08-03 14:10 depen64_2desk.squashfs
-rwx------ 1 root root 337457152 2010-08-02 00:21 depen64.squashfs
-rw-r--r-- 1 root root        17 2010-08-02 00:21 filesystem.module

$ cat grml_cd/live/2desk.module
depen64_1live.squashfs
depen64_2desk.squashfs
Troubleshooting
- If you are unsure if your aufs stacked framework works or not, try the following. If you get similar results, then your aufs is working fine.
  aptitude install aufs-tools

  cd /dev/shm
  mkdir -pv aufs/day{0,1} aufs/base aufs/u

  % mount -v -t aufs -o br:aufs/day0:aufs/base none aufs/u
  none on /dev/shm/aufs/u type aufs (rw,si=7be60552a6e3e8d3,xino=/dev/shm/aufs/day0/.aufs.xino,br:/dev/shm/aufs/day0=rw:/dev/shm/aufs/base=ro)

  % mount -v -o remount,prepend:aufs/day1,mod:aufs/day0=ro,del:aufs/day0 aufs/u
  none on /dev/shm/aufs/u type aufs (rw,si=7be60552a6e3e8d3,xino=/dev/shm/aufs/day0/.aufs.xino,br:/dev/shm/aufs/day1=rw:/dev/shm/aufs/base=ro)